
Introduction
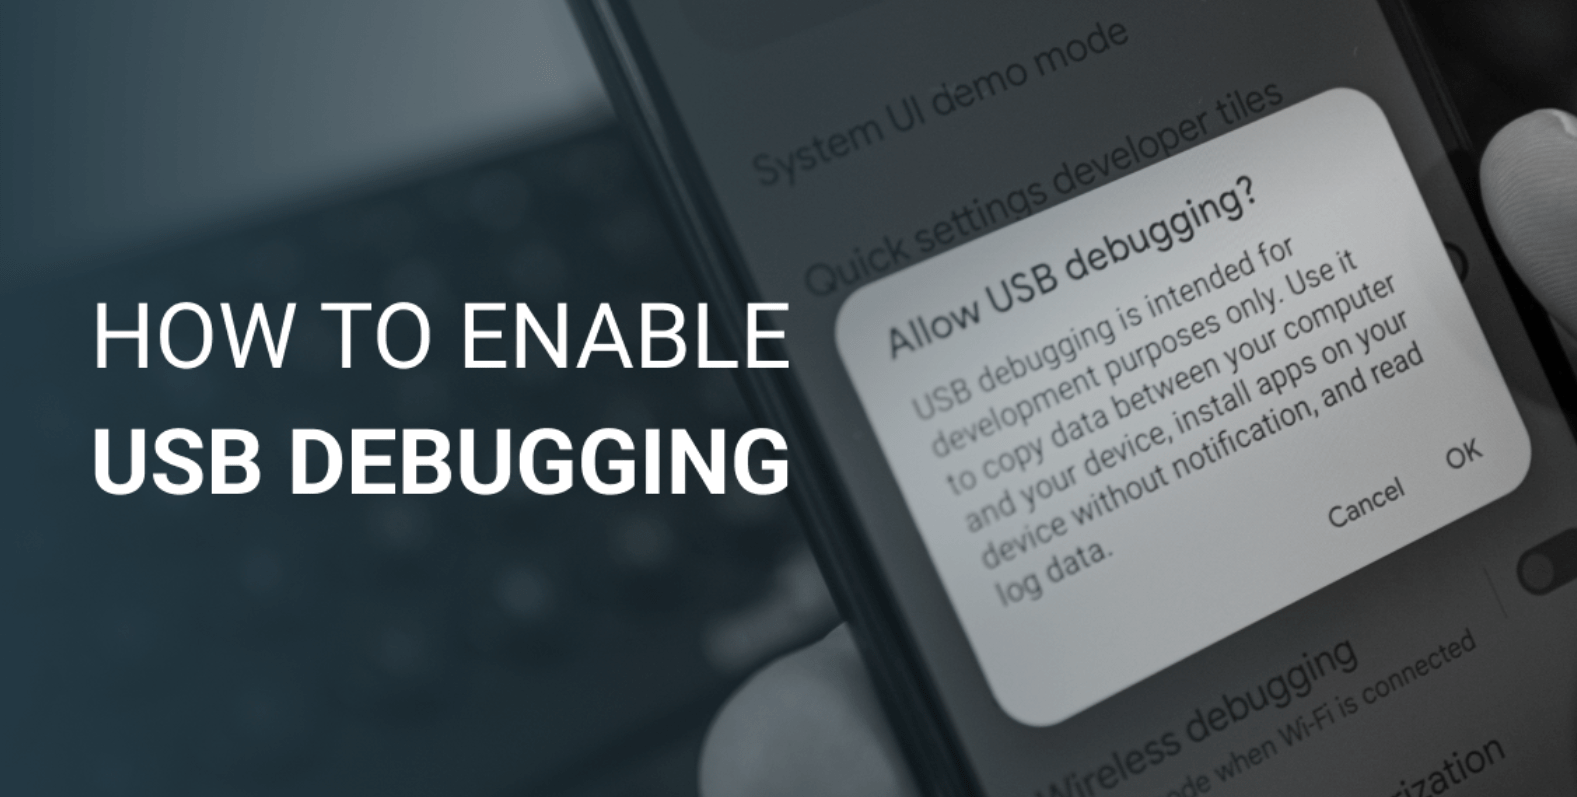
Welcome to the world of USB debugging on Android! If you’ve ever wondered about the inner workings of your Android device or faced challenges with a malfunctioning screen, this article is your guide. In just three simple steps, we’ll explore the essential process of enabling USB debugging on Android.
Whether you’re a curious user or dealing with a broken screen scenario, understanding USB troubleshooting is a key skill. Stay with us as we demystify the process, address safety concerns, and provide solutions for various situations.
Let’s try to the realm of Android development options and unveil the power behind USB troubleshooting.
Table of Contents
Toggle1. Understanding USB Debugging on Android:
What Is USB Debugging?
USB debugging is a feature that allows an Android device to communicate with a computer over a USB connection. Essentially, it opens a bridge between your Android device and a computer, enabling advanced operations and diagnostics.
What Is USB Debugging Mode on Android?
USB troubleshooting Mode is a specific state that your Android device enters when connected to a computer. In this mode, the device is ready to accept commands and data from the computer for debugging purposes. It plays a crucial role in tasks like installing apps, transferring files, and troubleshooting.
What Does Android USB Debugging Do?
Android USB troubleshooting is a developer tool that grants elevated access to your device. It facilitates the transfer of data between your computer and Android, allowing for tasks such as installing custom ROMs, debugging applications, and accessing advanced features that are not available in standard usage mode.
Understanding these fundamental aspects of USB debugging sets the stage for exploring its practical applications and the steps involved in enabling it on your Android device.
2. Enabling USB Debugging on Android in General:
How to Enable USB Debugging on Android in 3 Steps:
Enabling USB troubleshooting on your Android device is a straightforward process. We’ll guide you through three simple steps that involve accessing your device’s settings, navigating to the developer options, and toggling the SD Card debugging feature. These steps form the foundation for various debugging tasks.
How Do I Enable USB Debugging on Android?
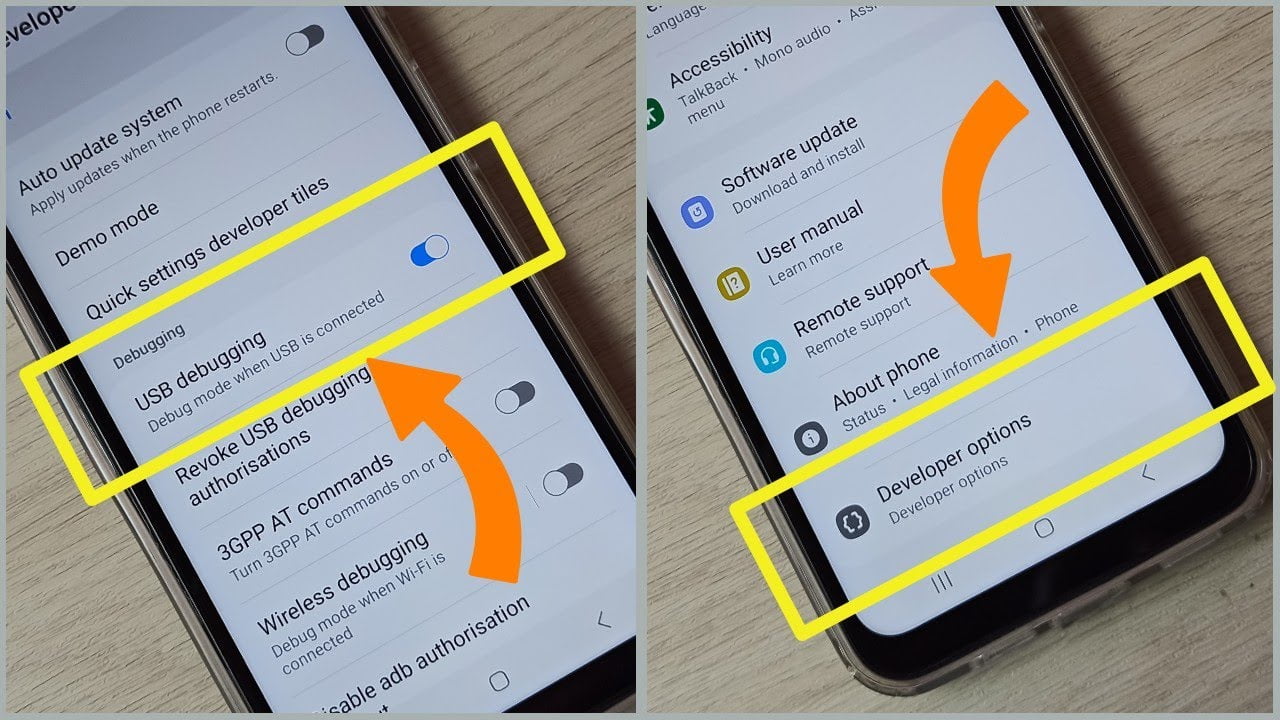
To enable USB troubleshooting, you’ll need to activate the Developer Options on your Android device. Once activated, you can locate the SD Card debugging setting within Developer Options and turn it on. This simple but crucial step unlocks the full potential of your device for development and debugging purposes.
What Are Android Developer Options?
Developer Options are a set of advanced settings on Android devices, designed for developers and experienced users. These options include SD Card debugging, among other features like OEM unlocking, allowing mock locations, and debugging over Wi-Fi. Enabling Developer Options opens up a range of customization and debugging capabilities.
How to Enable Developer Options on Android:
Enabling Developer Options is typically a hidden feature. We’ll show you how to unlock it by navigating to the “About Phone” section in your device settings and tapping on the build number multiple times. Once activated, Developer Options become accessible in the main settings menu.
How to Disable Developer Options on Android:
While Developer Options offer powerful tools, it’s essential to know how to disable them when not needed. We’ll guide you through the process of deactivating Developer Options to ensure the security and normal functioning of your Android device.
Mastering these general steps is the first step towards harnessing the capabilities of USB debugging on your Android device. The subsequent sections will delve deeper into specific scenarios, including enabling USB troubleshooting with a broken screen and troubleshooting common issues. Stay tuned for a comprehensive guide to Android debugging.
3. Special Cases: Enabling USB Debugging with a Broken Screen:
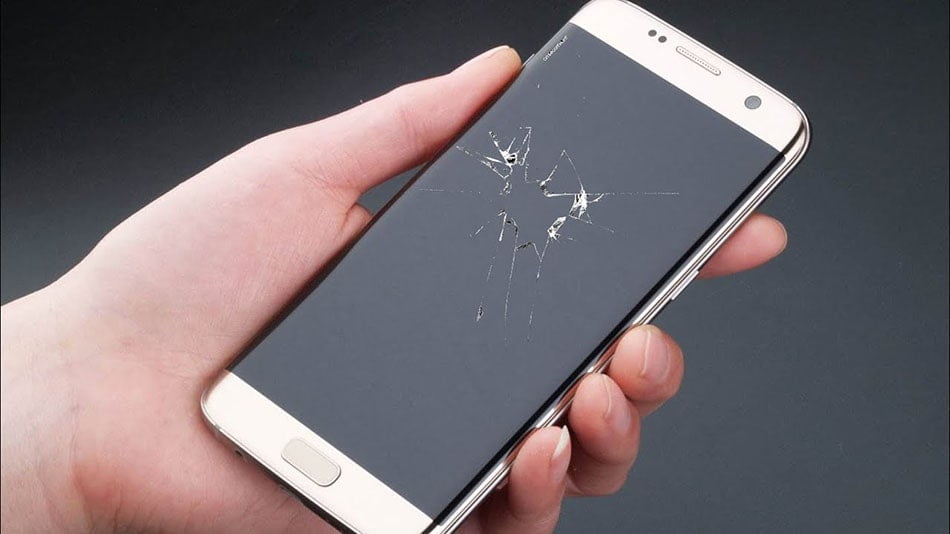
Why Should You Enable USB troubleshooting on Android with Broken Screen?
Enabling USB debugging becomes crucial when faced with a broken screen on your Android device. It allows you to access and control your device from a computer, facilitating data recovery, troubleshooting, and other essential tasks even when the screen is unresponsive.
How to Enable USB Debugging on Android with Broken Screen:
When dealing with a broken screen, we provide three distinct methods to enable SD Card debugging:
-
Use OTG to Enable USB Debugging on Android with Black Screen:
- Utilize an OTG (On-The-Go) adapter to connect a USB mouse to your Android device. With the mouse acting as a virtual touch input, navigate through the settings to enable USB troubleshooting.
-
Use ADB Command to Enable USB Debugging on Android with Black Screen:
- Leverage ADB (Android Debug Bridge) commands from a computer to enable SB debugging on your Android device with a black screen. This method requires minimal interaction with the device itself.
-
Use MTP USB Drivers to Enable USB Debugging on Android with Broken Screen:
- Install MTP (Media Transfer Protocol) USB drivers on your computer and connect your Android device. This method allows you to control the device from your computer, enabling USB troubleshooting even when the screen is unresponsive.
These tailored solutions address the specific challenges posed by a broken screen, ensuring that you can still harness the benefits of USB troubleshooting in various scenarios.
By understanding and implementing these methods, you’ll be equipped to navigate through challenging situations and make the most out of your Android device, even when faced with physical damage. The versatility of SD debugging shines through, proving its importance in both routine and unexpected scenarios.
4. Safety Concerns and Troubleshooting:
Is USB Debugging Safe?
USB debugging is generally safe when used responsibly. However, it’s crucial to be aware of potential risks, such as unauthorized access and data breaches. We’ll outline best practices to ensure the secure use of USB troubleshooting, including keeping your device locked, using trusted computers, and staying vigilant against potential security threats.
If USB Debugging Is Not Working:
Encountering issues with USB debugging is not uncommon. We’ll provide a quick troubleshooting guide to address common problems, such as connection errors, driver issues, and debugging settings not activating. By following these troubleshooting steps, you can overcome obstacles and ensure a smooth USB troubleshooting experience.
Exploring the safety aspects and troubleshooting measures adds a layer of confidence to your USB troubleshooting endeavors. By understanding potential risks and knowing how to address challenges, you can fully embrace the power of USB troubleshooting without compromising the security or functionality of your Android device.
5. Exploring Further: Android Debugging Tools:
Is Node Tree Debugging the Same as USB Debugging?
Node tree debugging is a distinct concept from USB debugging. While USB troubleshooting focuses on the communication between your Android device and a computer, node tree debugging involves inspecting the structure of a webpage or app in a hierarchical manner. We’ll briefly differentiate between these two debugging approaches to clarify their unique roles.
How Do You Use Android USB Debugging?
Once USB debugging is enabled, we’ll provide a quick overview of how to use it effectively. This includes tasks such as deploying apps for testing, accessing log data, and interacting with your device through a computer. Understanding the practical applications of USB troubleshooting enhances your overall Android development experience.
What Are Android Developer Options?
Beyond USB troubleshooting, Developer Options offer a range of advanced settings. We’ll briefly explore some key options, such as enabling OEM unlocking, allowing mock locations, and debugging over Wi-Fi. These features cater to developers and power users, providing additional tools for customization and testing.
By delving into these additional aspects of Android debugging, you’ll gain a comprehensive understanding of the tools at your disposal. Whether you’re a developer looking to optimize your workflow or an enthusiast exploring the capabilities of your Android device, this section will broaden your perspective on the diverse world of Android debugging.
USB Debugging Android 12:
Enabling USB debugging on Android 12 follows the same general steps as earlier versions. Access the Developer Options through the device settings, activate SB debugging, and unleash the advanced capabilities of your Android 12 device for development and debugging tasks.
USB Debugging Samsung:
For Samsung devices, the procedure is consistent. Head to the device settings, unlock Developer Options, and toggle on USB debugging. Samsung’s implementation of SB debugging aligns with the standard Android process, providing developers with the necessary tools.
USB Debugging OnePlus:
OnePlus devices share the standard Android method for enabling USB troubleshooting. Access Developer Options in the settings, activate SB debugging, and harness the full potential of your OnePlus device for debugging and development purposes.
USB Debugging App:
Certain situations may call for the use of a USB debugging app. These apps often provide a simplified interface to toggle SB debugging, making it more accessible without delving into the device settings. Install a reputable SB debugging app from the Play Store and follow the app-specific instructions for activation.
How to Disable USB Debugging:
Disabling USB debugging is as important as enabling it, especially for security reasons. Head to the Developer Options in your device settings, locate SB debugging, and toggle it off. This ensures that your device returns to a more secure state, minimizing potential risks associated with elevated debugging access.
How to Enable USB Debugging on Android from a Computer:
Enabling USB debugging from a computer involves using the Android Debug Bridge (ADB) commands. Connect your Android device to the computer via USB, ensure ADB is installed, and execute the necessary commands to enable UB debugging. This method is particularly useful when the device screen is inaccessible.
Conclusion
In conclusion, mastering the art of enabling USB debugging on your Android device opens up a realm of possibilities for both users and developers alike. From the fundamental steps of activation to the nuances of troubleshooting and exploring advanced options, this guide has equipped you with the knowledge to navigate various scenarios.
Whether it’s recovering data from a broken screen or optimizing your development workflow, SB debugging proves to be an invaluable tool. Remember to exercise caution, follow best practices for security, and explore the diverse landscape of Android debugging tools.
As technology evolves, the ability to harness the potential of SB debugging ensures that you stay in control of your device and make the most of its capabilities. Explained into the world of Android development with confidence, armed with the understanding and skills to leverage USB debugging effectively.


2 thoughts on “A Comprehensive Guide to USB Debugging, Developer Options, and Troubleshooting in 3 Steps”